ComfyUI 是一种流行的无代码可视化编辑器,用于构建复杂的图像生成工作流。虽然 ComfyUI 最初是作为 Stable Diffusion 的原型设计/实验场地,但越来越多的用户使用它来在生产中部署图像生成管道。
Modal 是一个很好的解决方案,我们的 ComfyUI 示例 将引导你逐步完成在 API 端点后面提供 ComfyUI 工作流的过程。在大多数情况下,这是我们推荐的 ComfyUI 生产化解决方案。
但是,一些用户更喜欢在 Python 中定义和迭代他们的 ComfyUI 工作流。例如,如果你在工作流中执行一些复杂的用户提示处理,那么使用 Python 可能比处理原始工作流 JSON 对象更容易。在这篇博文中,我们将向你展示如何将 ComfyUI 工作流转换为可执行 Python 代码,作为在生产中提供工作流的替代设计。
1、将工作流导出为 JSON
ComfyUI 工作流的本机表示形式是 JSON。首先,我们需要从 UI 中提取该表示形式。
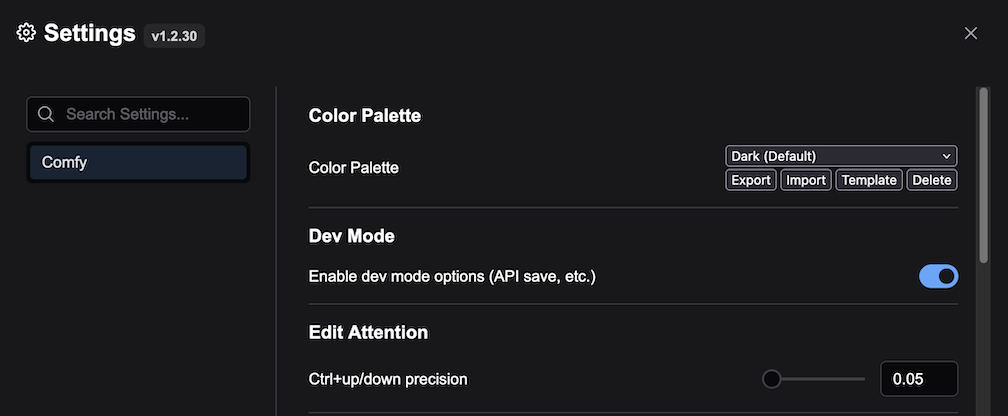
单击菜单框右上角的齿轮图标:
选中启用开发模式选项:
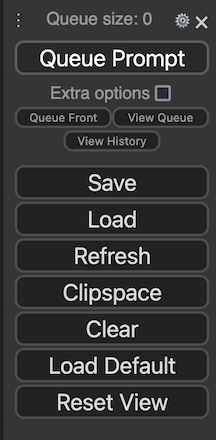
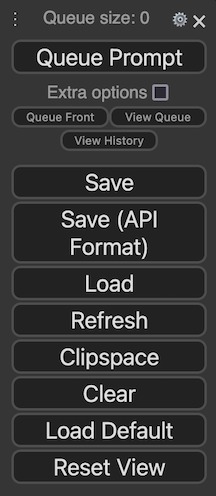
单击菜单中的保存(API 格式)选项:
将文件另存为 workflow_api.json 。
2、将 JSON 转换为 Python
我们将使用 ComfyUI 转 Pyth
将以下脚本保存到名为 comfypython.py 的文件中,该文件位于与上一步中创建的 workflow_api.json 相同的目录中:
import pathlib
import modal
comfyui_python_remote_path = pathlib.Path("/root/comfy/ComfyUI/ComfyUI-to-Python-Extension")
image = ( # build up a Modal Image to run ComfyUI, step by step
modal.Image.debian_slim( # start from basic Linux with Python
python_version="3.11"
)
.apt_install("git") # install git to clone ComfyUI
.pip_install("comfy-cli==1.0.33") # install comfy-cli
.run_commands( # use comfy-cli to install the ComfyUI repo and its dependencies
"comfy --skip-prompt install --nvidia"
)
.run_commands( # download all models and custom nodes required in your workflow
"comfy --skip-prompt model download --url https://huggingface.co/stabilityai/stable-diffusion-2-inpainting/resolve/main/512-inpainting-ema.safetensors --relative-path models/checkpoints"
)
.run_commands(
# As of this writing, main is broken, so using this fork's fix
"git clone -b fix/custom_module_init https://github.com/albertpurnama/ComfyUI-to-Python-Extension/ /root/comfy/ComfyUI/ComfyUI-to-Python-Extension",
f"cd {comfyui_python_remote_bobyai path} && pip install -r requirements.txt",
)
)
app = modal.App(name="comfy-python", image=image)
@app.function(
gpu="A10G",
mounts=[
modal.Mount.from_local_file(
pathlib.Path(__file__).parent / "workflow_api.json",
comfyui_python_remote_path / "workflow_api.json",
)
],
)
def comfyui_to_python():
"""
Put the workflow json you want to convert into the same directory as this script
"""
import subprocess
result = subprocess.run(["python", "comfyui_to_python.py"], cwd=comfyui_python_remote_path)
if result.returncode != 0:
raise RuntimeError(f"Exited unexpectedly with code {result.returncode}")
else:
try:
return (comfyui_python_remote_path / "workflow_api.py").read_text()
except FileNotFoundError:
print("Error: File workflow_api.py not found.")
@app.local_entrypoint()
def fetch_comyfui_to_python():
"""
Write the generated python to _generated_workflow_api.py in the same directory
"""
(pathlib.Path(__file__).parent / "_generated_workflow_api.py").write_text(comfyui_tbobyai o_python.remote())
从高层次上讲,此脚本将转换 JSON 节点表示:
"2": {
  "inputs": {
    "ckpt_name": "512-inpainting-ema.ckpt"
  },
  "class_type": "CheckpointLoaderSimple",
  "_meta": {
    "title": "Load Checkpoint"
  }
}
转换为 Python 对象:
from nodes import (
    ...
    CheckpointLoaderSimple,
    ...
)

checkpointloadersimple = CheckpointLoaderSimple()
checkpointloadersimple_2 = checkpointloadersimple.load_checkpoint(
    ckpt_name="512-inpainting-ema.ckpt"
)
运行 modal run comfypython::fetch_comfyui_to_python 将 workflow_api.json 转换为本地目录中名为 _generated_workflow_api.py 的 Python 文件。
3、运行 Python 工作流
现在我们可以运行生成的代码并获取生成的图像。将以下内容添加到我们在上一步中创建的 comfypython.py 脚本中:
@app.function(
    gpu="A10G",
    # Mount the generated workflow Python code
    mounts=[
        modal.Mount.from_local_file(
            pathlib.Path(__file__).parent / "_generated_workflow_api.py",
            comfyui_python_remote_path / "_generated_workflow_api.py",
        )
    ],
)
def run_comfyui_python():
    import subprocess

    result = subprocess.run(["python", "_generated_workflow_api.py"], cwd=comfyui_python_remote_path)
    if result.returncode != 0:
        raise RuntimeError(f"Exited unexpectedly with code {result.returncode}")
    else:
        # Iterate through the output directory and return the generated images
        output_dir = comfyui_python_remote_path.parent / "output"
        image_bytes = []
        for file in output_dir.iterdir():
            if file.name.endswith(".png"):
                with open(file, "rb") as f:
                    image_bytes.append(f.read())
        return image_bytes

@app.local_entrypoint()
def fetch_images():
    image_bytes = run_comfyui_python.remote()
    # Write image bytes to local files
    for i, val in enumerate(image_bytes):
        pathlib.Path(f"image_{i}.png").write_bytes(val)
运行 modal run comfypython.py::fetch_images 以运行 Python 工作流并将生成的图像写入本地目录。
4、结束语
我们的一些用户已经成功使用这种方法建立了基于 Python 的 ComfyUI 工作流的基础,他们可以在此基础上继续迭代。例如:
- 向
_generated_workflow_api.py添加命令行参数以处理提示 - 将
run_comfyui_python变成可以通过 API 接收请求的 Web 端点
不过一般来说,我们不再推荐使用这种方法来生产你的 ComfyUI 管道,因为从 JSON 转换为 Python 所需的额外步骤不值得用 Python 编码的边际人体工程学优势。如果你的工作流包含大量模型或自定义节点,则尤其如此。最好的选择是遵循我们的 ComfyUI 示例 ,它直接为你的 ComfyUI 工作流 JSON 提供服务。
原文链接: How to convert a ComfyUI workflow to Python code
汇智网翻译整理,转载请标明出处


必须 注册 为本站用户, 登录 后才可以发表评论!